Let’s reverse something!
We’re going to go over a crackme from CrackMes.de. I’m going to assume you have a bit of background in x86 Assembly and some other high-level language with C-like syntax (C, C++, Javascript, Java). You should also have at least played around with a debugger, like OllyDbg, and a disassembler, like IDA Pro.
This particular crackme can be found here. You’ll need an account to download it. I’ll note that I’ve used this site with my real email address for several years and have never experienced any spamming or security issues. YMMV, of course, but don’t be too afraid.
At the time of this writing, there were two other solutions with tutorials posted. One of them is quite extensive but concentrates on a mathmatical shortcut based on a hint provided by the programmer. The other is just very straightforward and meant for those who have experience with crackmes and are just moving on to this slightly more difficult one. This tutorial will focus on recreating* the algorithm in C. As I said above, I assume you already have a bit of experience or at least know enough to be able to acquire and set up IDA and OllyDbg yourself. You should always be wary of downloading and running software from unknown sources. As far as I can tell, this code is safe but that could change between now and the time you download it so I can’t stress enough how much I recommend you use VMs. I run IDA and OllyDbg in a Windows XP VM and do all this writing on a Linux VM, both of which are running on VirtualBox.
* Not really “recreating” since the code was originally written in assembly but the point is to create higher-level code from a dissassembly.
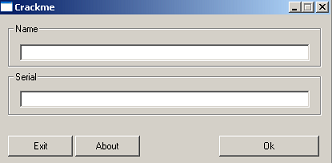
To begin, let’s fire up the crackme and see what it does.
We should check out some of the functionality first. This allows us to recognize certain code constructs or strings during our disassembly.
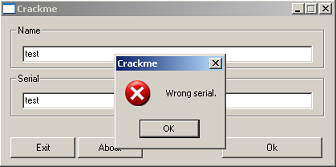
Just checking…
And the About box?
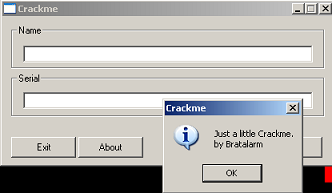
Okay, it’s nothing crazy. Let’s drop it in IDA and see what the disassembly looks like.
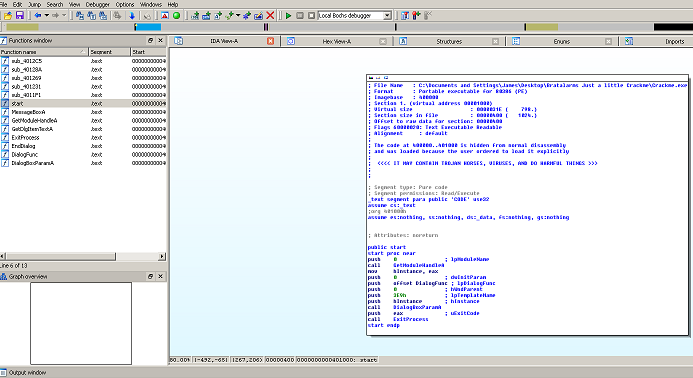
Well, not much in terms of functionality. Normally, this would be a sign of packing but that’s not what we’re dealing with here. This really is just a minimalist program.
Let’s check out the strings listing.
There’s a couple interesting things in there. Let’s follow that “Roeoeoe…!” thing; it looks like it might be the ‘right answer’ string. Double-click it and it takes you to the .data segment. On the same line, you should see an auto-comment “; DATA XREF: DialogFunc…”. Double click that to see where in the code this is referenced. *Ignore that equation thing for now. It’s a hint from the programmer and one of the other solutions posted on crackmes.de already covers it.
Now we’re in the code segment. IDA’s in ‘text’ view though so tap the spacebar to switch to the Graph View and see what’s going on here.
Take a look at the image below.
This is what you should see. If you were to scroll to the top of the graph, you’d see that we’re in the DialogFunc() function. Take a look at the things I labeled in the image.
-
This is where (what we think is) our success string is located. It’s highlighted simply because I clicked it. IDA will highlight whatever you click on so you can see multiple instances of it throughout the code.
-
That line is coming out of the small box above and going back up to the box labeled “loc_40116B”. IDA noted that this block of code is referenced in a loop so it broke it out separately for us. Now, thinking logically about a license key or password, a loop is how you’d iterate through every character to encode, decode or run it through whatever formula. That’s not the case here though (explained in #4). At the very bottom of this block you can see there’s a JNZ instruction. See #3.
-
I’ve renamed* mine because if you follow the green arrow (green meaning the code executed if the jump is taken) you’ll notice the several PUSH statements before the CALL to MessageBoxA. All this is doing is pushing function parameters on the stack and displaying a Windows Message Box dialog. IDA annotated what those strings contain so we can see this is the dialog that pops up when you get a wrong answer.
*To rename it, select the “loc_######” and tap ‘n’. In the dialog that pops up, call it whatever you like. Since it’s not a function, it won’t show up in IDA’s Functions window. However, you can check the “Include in Names list” box to see it in that listing. You can see the Names by turning on that view in View»Open Subviews»Names. I prefer to do this but it can get unwieldy in a larger program to label random loops.
- This green box comes all the way down from off-screen to tell us we’re wrong. Why does this matter? Well, it’s possible to be wrong before that previous block of code is ever executed so it can’t be the end-all-be-all of verification.
Let’s see where that arrow began. This next image is just up higher. That other arrow is coming from the box on the bottom of the image. Let’s go over these boxes:
-
Just like #3 in the previous image, we can use the strings here, along with teh requisite PUSH and CALL instructions, to ascertain what’s going on and rename this block of code.
-
This block is interesting. Notice that it calls GetDlgItemTextA. It just sounds like the kind of function that would retrieve input from a control on a dialog box. To verify, Google it and/or check it out on MSDN (the ‘A’ at the end just means this is the ASCII version of the function; a ‘w’ would mean UNICODE). MSDN also tells us what parameters are being used and in what order. We know this program is using the stdcall calling convention because if we scroll to the top of the graph, it says it: “; INT_ PTR __stdcall DialogFunc(…”. You can also just see that IDA’s annotated the parameter names for us and they’re in reverse order of the function declaration on MSDN.
| Parameter | Value | Notes |
|---|---|---|
| hDlg | We don’t care about this. | |
| nldDDlgItem | 0x3ea | Points to the control for which we want the value. |
| lpString | A pointer for the function to store the value in. | |
| cchMax | 0x100 (256d) | Whatever this value is, it’s capped at 256 characters max. |
Is this the Name or Serial? Click on GetDlgItemTextA to highlight it and see if it’s called elsewhere. Well – wouldn’t you know it? – it’s right there in that bottom block.
- Look at the condition for the jump after the function call:
call  GetDlgItemTextA
cmp   eax, 0x23
jnz   ShowDlgWrong
Well, what’s in EAX and why should it be 0x23? Well, EAX is where most functions return values. Go back to that MSDN page for the function and you can see that it returns an integer. It returns zero if it failed; otherwise, it returns the length of the string it got from the dialog (not counting the terminating null character).
Looking a bit above that you can see that cchMax is 0x24 this time. That means whichever value this is, Name or Serial, it must be exactly 0x23 (35d) characters. That’s good to know! Select that line and insert a colon (no, not a semi-colon). Insert a note like “String must be 35 chars”. IDA puts in a semi-colon for you. You need to type a colon to say it’s a one-time comment; semi-colon would insert a repeating comment (that would show anywhere else this was referenced, which is nowhere).
Note that this is the block of code from earlier, the one that leads to failure. Now we know you automatically get the “Wrong serial.” message if one bit of your data isn’t of the right length.
-
The line of code here, xor’ing EAX against it self, just zeros out the EAX register (read up on XOR logical operations if you don’t know why). This is where GetDlgItemTextA returned its value from before. It goes unused. This tells us two things that are interesting: 1) Whatever this is, Name or Serial, can be of any length, and 2) The developer never bothered to check whether this function even succeeded. This could cause the program to crash if the value has any significance later. Maybe it doesn’t, but crashes are a reverser’s best friend. According to MSDN, the function will just truncate the string it gets from the control at the length specified (256 characters in this case).
-
Well, let’s figure out which of these is Name and which is Serial. This block is named for its memory location 0x4010B5. Fire up OllyDbg and place a breakpoint at this location with F2. I chose this location because it’s after the previous block, so the string will be filled in already, and because it’s a loop. We should figure out what this loop does.
After you’ve set your breakpoint, hit run and type in a username and password. Use different values in each so we can distiguish between them in memory. The code will break after you hit OK.
-
Now we know that the first block is for the Name. Go back to IDA and either insert a comment there and/or rename the block of code. I use “GetTextBoxName”. I then went down to that other block of code and added a name there, “GetTextBoxSerial”. There’s no “loc_######” to rename there, so just select the XOR instruction and hit ‘n’ and IDA will insert your new name. If it asks you about increasing the max length of names, just say yes.
-
Let’s figure out this loop:
xor   eax, eax                  ;loop preparation
xor   edx, edx                  ;loop preparation
mov   dl, byte ptr ds:[esi]     ;loop start
add   eax, edx                  ;loop body
inc   esi                       ;loop iterator
test  edx, edx                  ;loop conditional test
jnz   short Crackme.004010B5    ;loop end/jump
mov dword ptr ds:[Crackme.403078], eax ;loop results utilization-
First, notice that the first line references a byte pointed to by the memory location in the ESI register. On the right, OllyDbg shows you the entire null-terminated string but we know that it’s starting with the first character (byte) in code. The MOV instruction puts that character into EDX’s lowest 8 bits.
-
Next, it’s adding EDX to EAX and storing the result in EAX. Well, notice that right above the loop, they were zero’d out. So the first time around, this will do 0+0.
-
Next up is incrementing ESI. We know it starts at the first character, the ‘u’ in “username” in the image here. This literally just adds 1 to the value in ESI, which is the memory address of the string’s first byte.
-
Next is TESTing EDX against itself. All the the TEST instruction does is AND EDX against itself and set EFLAGS based on the result. The result is that if EDX is zero, then ZF (Zero Flag) is true. If EDX isn’t zero, then ZF is false.
-
ZF will remain false as long as there’s a character in EDX, which is until we hit the null terminator in the string. So the JNZ (Jump if Not Zero) will always jump until we hit the end of the string.
-
In English, this means our loop is cumulatively adding up the characters’ values in EAX. To skip through this all, remove the breakpoint and place another after the JNZ and hit run.
When it breaks, look at the value of EAX. For “username”, it’s 0x360. The very next line stores this in a memory location. Go back to this line in IDA and name that memory location (dword_403078) something useful, like “NameSum”.
Let’s move on a bit.
jnz     short Crackme.004010B5
mov     dword ptr ds:[Crackme.403078], eax
dec     eax
imul    eax, 3
mov     dword ptr ds:[Crackme.40307C], eax
mov     esi, offset Crackme.004030B0     ; ASCII "username"
mov     eax, 0x12345678
xor     edx, edx
Now that we’ve saved off our NameSum, we decrement EAX and do a multiplication with IMUL. This takes the value of EAX (which is now 0x359 for me), multiplies it by three and stores the result back in EAX. Essentially, it’s:
int EAX = 0x360;
EAX -= 1;
EAX *= 3;
// EAX is now 0xA1D (2589d)